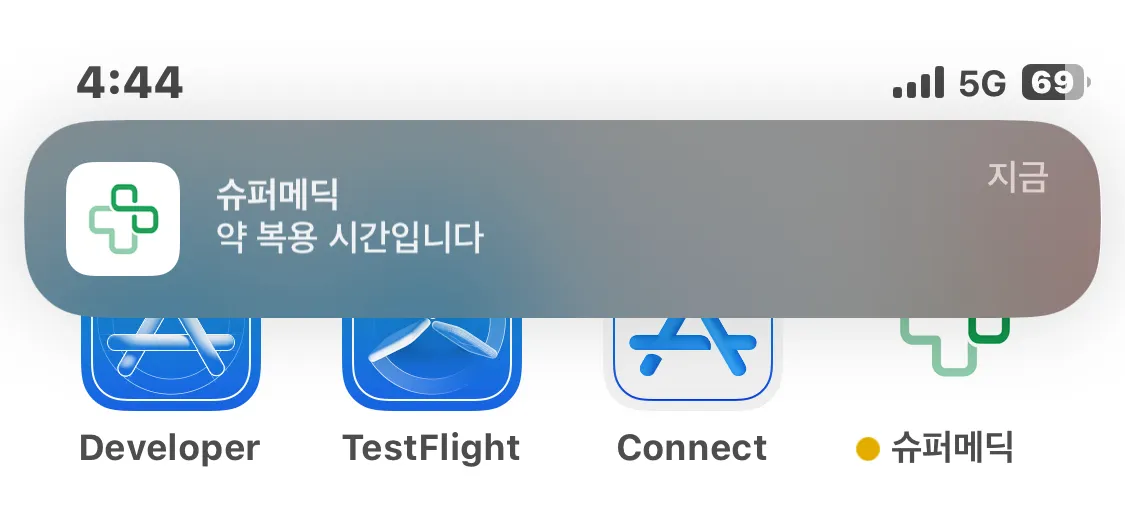
IOS 및 안드로이드의 Notification 설정이 끝난 것을 가정하고 코드 예시
 flutter 설정
1. Main.dart
Future<void> backgroundHandler(RemoteMessage message) async {
print(message.data.toString());
print(message.notification!.title);
print(message.notification!.android);
print('================================================================');
}
// ignore: prefer_const_constructors
void main() async {
WidgetsFlutterBinding.ensureInitialized();
await Firebase.initializeApp(
options: DefaultFirebaseOptions.currentPlatform,
);
FirebaseMessaging.onBackgroundMessage(backgroundHandler);
runApp(const RestartWidget(child: MyApp()));
}
Dart
복사
1.
Firebase.initializeApp() Flutter SDK 초기화 후 Firebase 초기화를 가장 먼저해줌.
•
2.
FirebaseMessaging.onBackgroundMessage(backgroundHandler);
•
앱이 백그라운드에 있을 때의 행동을 결정
•
핸들러 안에서 notification을 띄운다던가 필요한 행동을 하면 될 것 같다.
2. FirebaseMessage.dart
import 'dart:io';
import 'package:firebase_messaging/firebase_messaging.dart';
import 'package:flutter/cupertino.dart';
import 'package:flutter_local_notifications/flutter_local_notifications.dart';
class LocalNotificationService {
static final FlutterLocalNotificationsPlugin _notificationsPlugin =
FlutterLocalNotificationsPlugin();
static const AndroidNotificationChannel channel = AndroidNotificationChannel(
"채널 ID",
"APP명",
description: "description", // description
importance: Importance.max, // 우선순위 높게 해줘야 백그라운드에서도 알림이 잘 온다.
);
static void initialize(BuildContext context) async {
const InitializationSettings initializationSettings =
InitializationSettings(
android: AndroidInitializationSettings("@mipmap/ic_launcher"),
iOS: DarwinInitializationSettings());
await _notificationsPlugin
.resolvePlatformSpecificImplementation<
AndroidFlutterLocalNotificationsPlugin>()
?.createNotificationChannel(channel);
_notificationsPlugin.initialize(initializationSettings,
onDidReceiveNotificationResponse: (route) async {
Navigator.of(context).pushNamed(route as String);
});
}
static void display(RemoteMessage message) async {
try {
NotificationDetails notificationDetails = NotificationDetails(
android: AndroidNotificationDetails(
channel.id,
channel.name,
channelDescription: channel.description,
importance: Importance.max,
priority: Priority.high,
),
iOS: const DarwinNotificationDetails(),
);
if (message.notification != null && Platform.isAndroid) {
await _notificationsPlugin.show(
message.notification.hashCode,
message.notification?.title,
message.notification?.body,
notificationDetails,
payload: message.data["route"],
);
}
} on Exception catch (e) {
print(e);
}
}
}
Dart
복사
•
flutter_local_notifications를 통해 알림 받을 채널 생성 및 시각화
1.
initialize() 가 직접적인 채널 생성 함수
initializationSettings 변수를 이용해여 Android와 IOS의 기본 설정 저장
AndroidFlutterLocalNotificationsPlugin 을 통해 Android 채널을 따로 생성해 줌
→ Android 8 이상부터는 꼭 해주어야 함!!
_notificationsPlugin.initialize 나머지 플랫폼의 채널 생성
→ onDidReceiveNotificationResponse : Android의 forground 상태에서의 Handling
2.
display() 를 이용해 팝업 창 등을 구현
notificationDetails()
→ IOS의 경우 Apple의 Push Notification UI를 이용
→ Android의 경우는 UI를 만들어주어야 하기 때문에 채널과 우선순위 추가
_notificationsPlugin.show() 알림을 보여줄 UI 생성
→ Android일 때만 사용
3. MainPage.dart(Main.dart에 해도 무방, 웬만하면 top-level에 구현)
void initState() {
super.initState();
LocalNotificationService.initialize(context);
// FirebaseMessaging.instance.setAutoInitEnabled(true);
FirebaseMessaging.instance.requestPermission(
alert: true,
announcement: false,
badge: true,
carPlay: true,
criticalAlert: false,
provisional: false,
sound: true,
);
FirebaseMessaging.instance.setForegroundNotificationPresentationOptions(
alert: true, // Required to display a heads up notification
badge: true,
sound: true,
);
FirebaseMessaging.instance.getAPNSToken().then((APNStoken) {
// print(APNStoken);
});
///gives you the message on which user taps
///and it opened the app from terminated state
FirebaseMessaging.instance.getInitialMessage().then((message) {
if (message != null) {
final routeFromMessage = message.data["route"];
Navigator.of(context).pushNamed(routeFromMessage);
}
});
///forground work
FirebaseMessaging.onMessage.listen((message) {
if (message.notification != null) {
LocalNotificationService.display(message);
}
});
///When the app is in background but opened and user taps
///on the notification
FirebaseMessaging.onMessageOpenedApp.listen((message) {
if (message.notification != null) {
final routeFromMessage = message.data["route"];
Navigator.of(context).pushNamed(routeFromMessage);
}
});
}
Dart
복사
1.
LocalNotificationService.initialize(context);
→ firebasemessage.dart에서 구현한 함수로 채널 생성 및 초기화
2.
FirebaseMessaging.instance.requestPermission()
→ 권한 요청
3.
FirebaseMessaging.instance.setForegroundNotificationPresentationOptions()
→ 소리, 배너, 팝업 등 알림이 어떻게 보일지 설정
4.
FirebaseMessaging.instance.getAPNSToken().then((APNStoken) {});
→ Apple의 경우 APNS 토큰을 사용하는데, 이를 받아오는 역할
5.
FirebaseMessaging.instance.getInitialMessage().then((message) {});
→ 앱이 종료된 상태에서의 Handling
→ 보통 눌렀을 때 페이지 이동 구현
6.
FirebaseMessaging.onMessage.listen((message) {});
→ 어플리케이션이 켜져있을 경우의 Handling
→ 내부에 dispaly() 함수는 firebasemessage.dart에서 생성한 함수로 안드로이드일 경우에만 UI를 만들어주는 코드
IOS일 경우에도 하도록 하면 알림이 2개가 오니 주의!!
7.
FirebaseMessaging.onMessageOpenedApp.listen((message){});
→ 백그라운드일 경우의 Handling(어플이 탭에 있는 경우)
하지만 IOS일 경우 알림을 누르면 이쪽으로 오게 됨
→ 즉, iOS 는 Foreground 상태일 때 onMessage.listen을 통해 푸시 알람을 받고
→ 이 푸시 알람을 눌렀을 때 onMessageOpendApp.listen으로 핸들링
 서버 설정
서버 설정
const schedule = require('node-schedule');
const admin = require('firebase-admin');
var serviceAccount = require("{firebase 콘솔에서 받은 server용 json파일}");
var certPath = admin.credential.cert(serviceAccount)
admin.initializeApp({
credential : certPath
});
//알림 보내기 1분마다 동작하는 스케줄링 코드
schedule.scheduleJob(' */1 * * * *', function () {
//...
//원하는 로직.....
notificationHandler(when, token )
})
// 내 서버 예시로 자신의 알림 로직에 맞게 변경해야함
function notificationHandler(when, token){
//...
//원하는 로직.....
console.log("send")
sendPushNotification(token, "제목", "내용");
}
function sendPushNotification(target_token, title, body) {
//target_token은 푸시 메시지를 받을 디바이스의 토큰값입니다
let message = {
notification: {
title: title,
body: body,
},
data: {
route: 'main' // flutter 환경에서 알림 클릭시 라우팅 해주기 위한 데이터 없어도 됨
},
android:{
priority:"high",
notification: {
channelId: //firebase Channel ID(android_channel_id)
}
},
token: target_token,
apns: {
payload: {
aps: {// 얘네는 IOS 설정인데 웬만하면 유지하되 잘 찾아보고 설정하는 것을 추천한다.
badge: 2.0,
"apns-priority": 5,
sound: 'default'
},
},
},
}
admin.messaging().send(message)
.then(()=> {
console.log("success");
})
}
JavaScript
복사
1.
sendPushNotification() 에서 android 항목에서 priority와 channer ID를 반드시 지정해주어야 함
→ 안그러면 우선순위를 낮게 처리해 새로운 채널을 스스로 생성해 기타 채널로 들어감
→ 기타 채널의 경우 우선순위가 낮기 때문에 팝업이 뜨지 않음
 Another
FirebaseOptions.dart(DefaultFirebaseOptions)
import 'package:firebase_core/firebase_core.dart' show FirebaseOptions;
import 'package:flutter/foundation.dart'
show defaultTargetPlatform, TargetPlatform;
class DefaultFirebaseOptions {
static FirebaseOptions get currentPlatform {
switch (defaultTargetPlatform) {
case TargetPlatform.android:
return android;
case TargetPlatform.iOS:
return ios;
default:
throw UnsupportedError(
'DefaultFirebaseOptions are not supported for this platform.',
);
}
}
// 아래 값들은 예시를 위해 비슷한 아무 값이나 넣은 것이니 자신의 것으로 바꿔서 잘 넣길 바란다.
static const FirebaseOptions android = FirebaseOptions(
apiKey: 'AIzaSyC4XdjP_4_NwqZlgD8_121234512345Vt4',
appId: '1:585309393841:ios:65cce1a2f460531wcvc1234',
messagingSenderId: '123456789012',
projectId: 'project-12345'
);
static const FirebaseOptions ios = FirebaseOptions(
apiKey: 'AIzaSyC4XdjP_4_NwqZlgD8_121234512345Vt4',
appId: '1:585309393841:ios:65cce1a2f460531wcvc1234',
messagingSenderId: '123456789012',
projectId: 'project-12345',
androidClientId:
'123456789012-171vxy4x70dc717u8ul7s49ampk13lul.apps.googleusercontent.com',
iosClientId: //완료
'123456789012-630881ql99k5djna2ivlic6krg0coole.apps.googleusercontent.com',
iosBundleId: 'com.project', //완료
);
}
Dart
복사

.png&blockId=7628ec0c-1357-4c37-a1e9-32a282f6efaa)

.png&blockId=be06ed4d-0152-4f0f-b4b4-821bd1fb30d9)
.png&blockId=39a86e12-3cf4-40df-8d5e-9891c5adc274)
_%25E1%2584%2587%25E1%2585%25A9%25E1%2586%25A8%25E1%2584%2589%25E1%2585%25A1%25E1%2584%2587%25E1%2585%25A9%25E1%2586%25AB.png&blockId=891e6648-1148-4e7c-bfcd-0463dc71545c)
.png&blockId=5e737e69-4f36-437b-95e0-7db747173000)
.png&blockId=5294c22e-8cee-4109-963f-c8cfe8c852cf)
